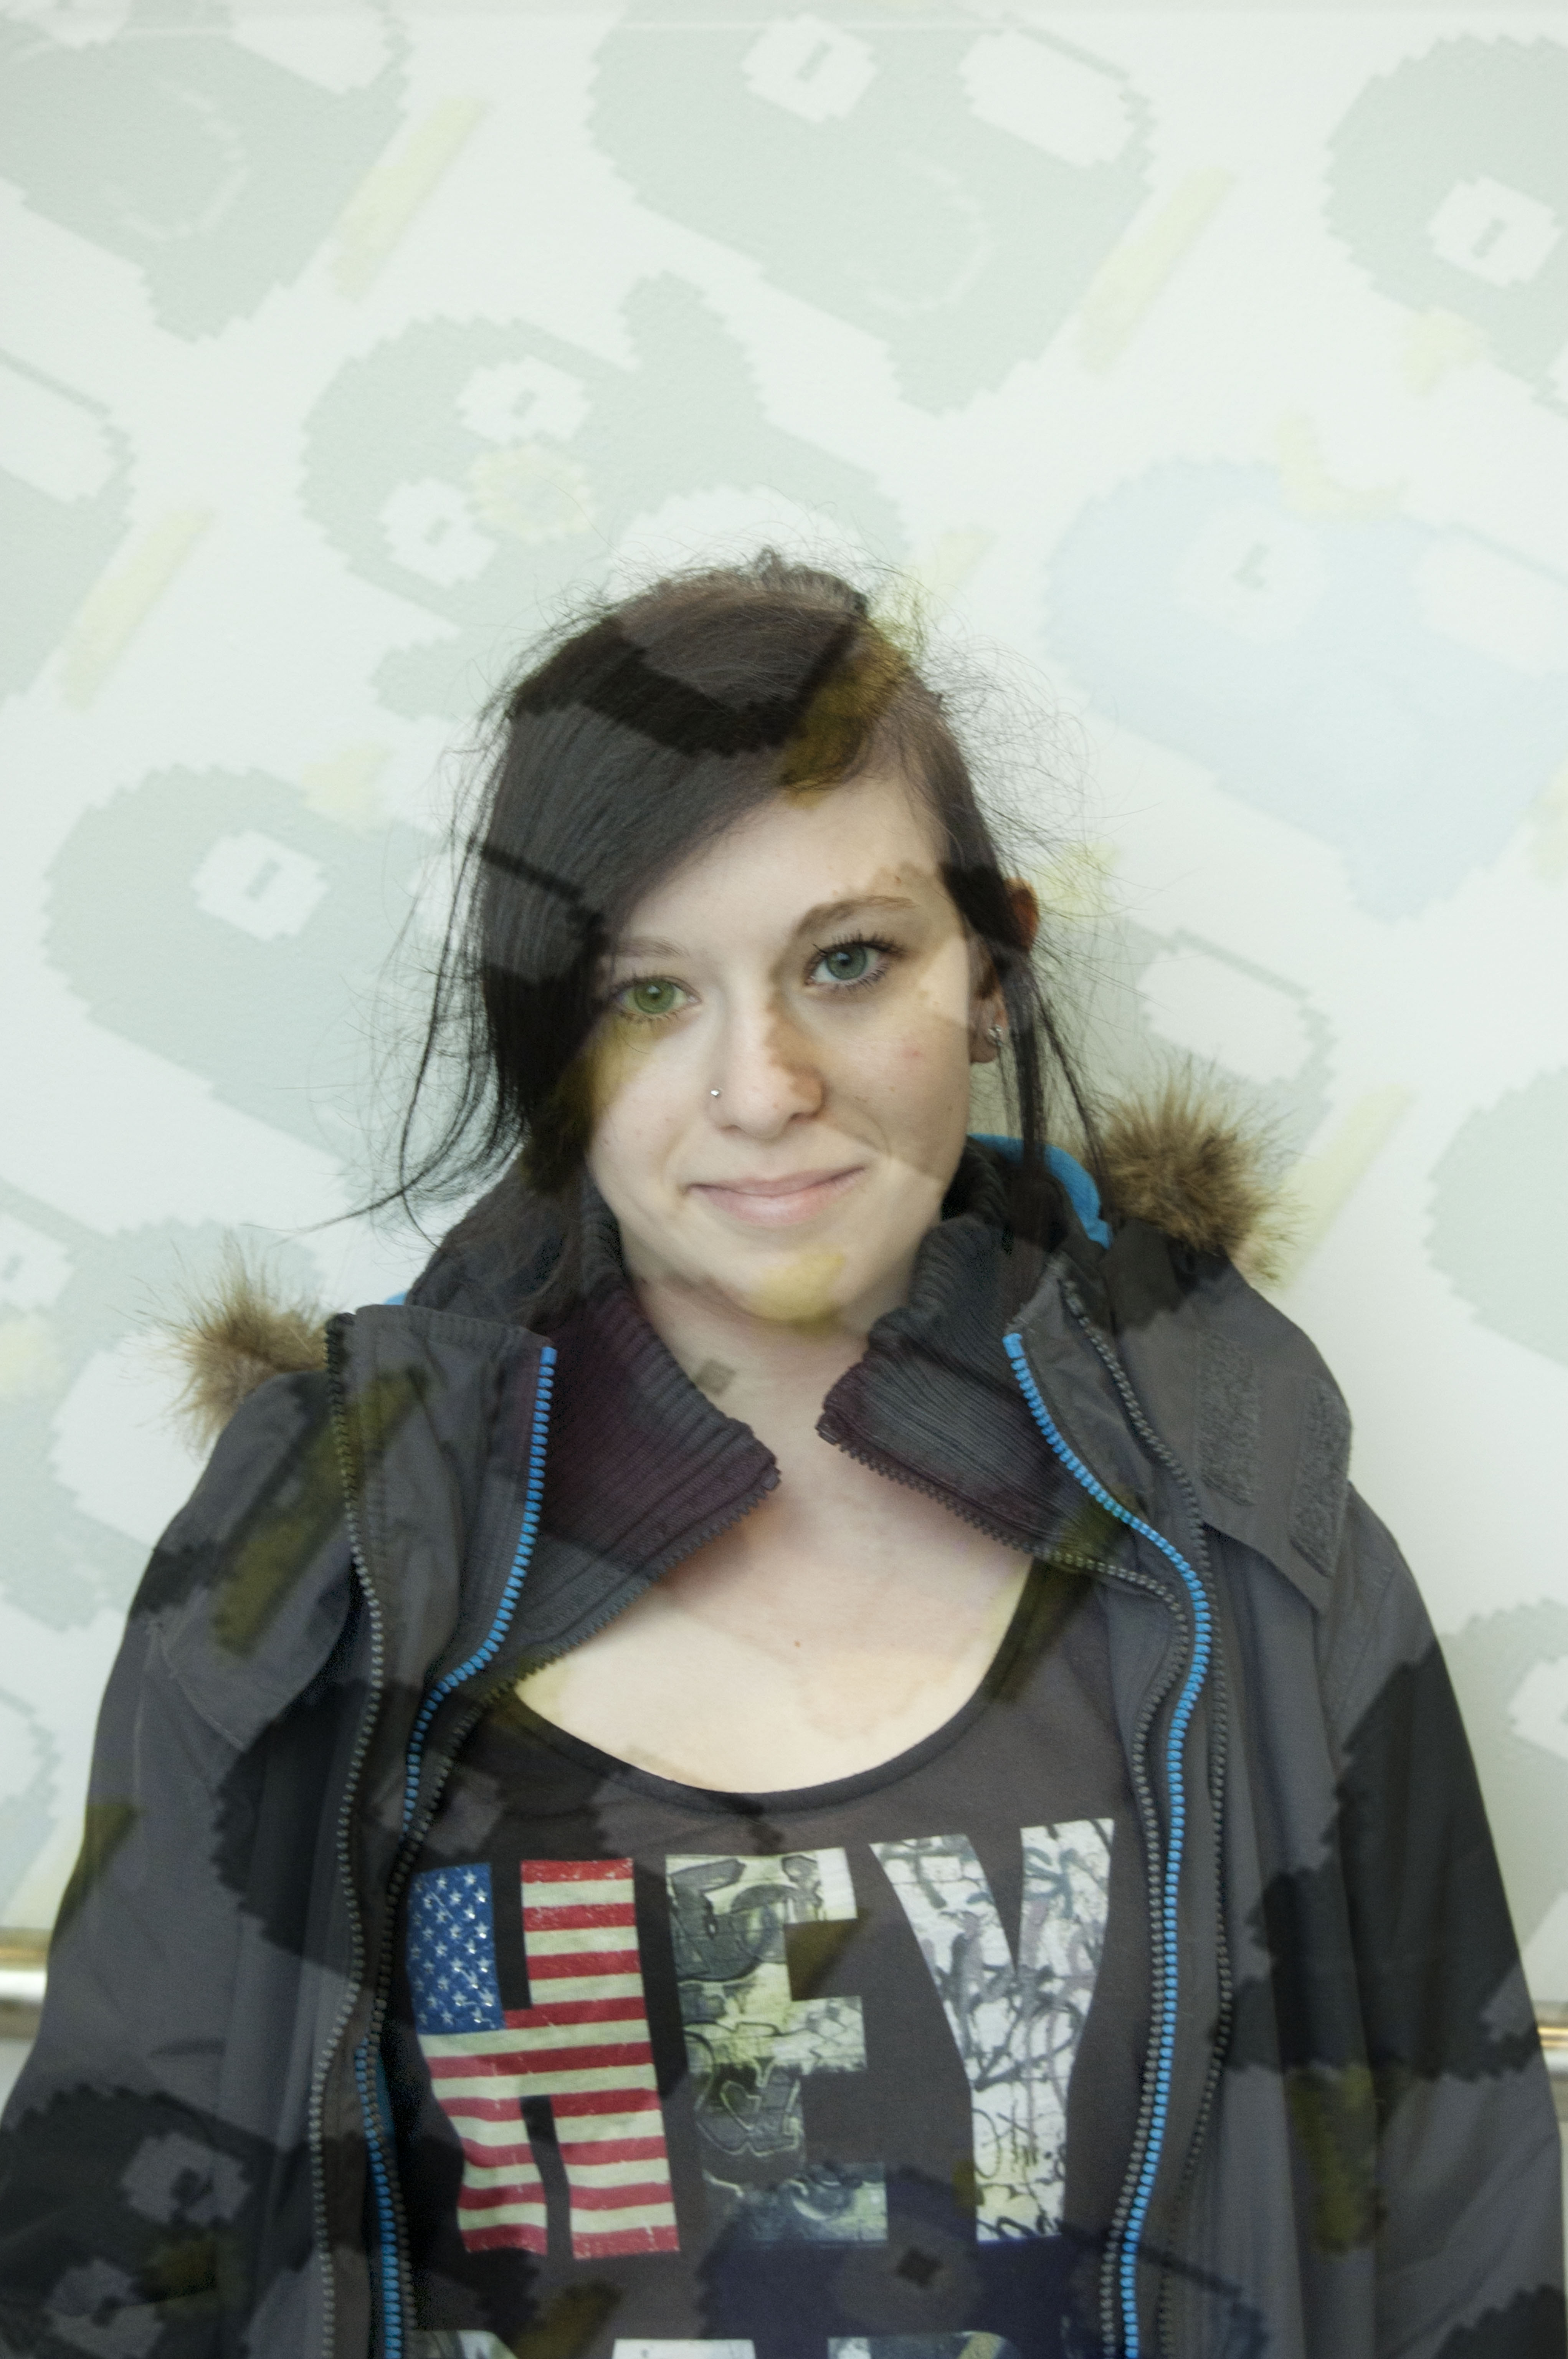
INTERNET:
Using a picture of myself and opening it in Photoshop, I then went into Google images and found 3 textures that I liked. Opening both images side by side in Photoshop, I selected the texture (CMD+A), copied it (CMD+C) and then toggled to the image of me (CMD+~). I then pasted the texture onto my image (CMD+V) and then went into the blending options. I chose “Soft light” for this image as it made it look really interesting, but not too dark that you couldn’t see my face.

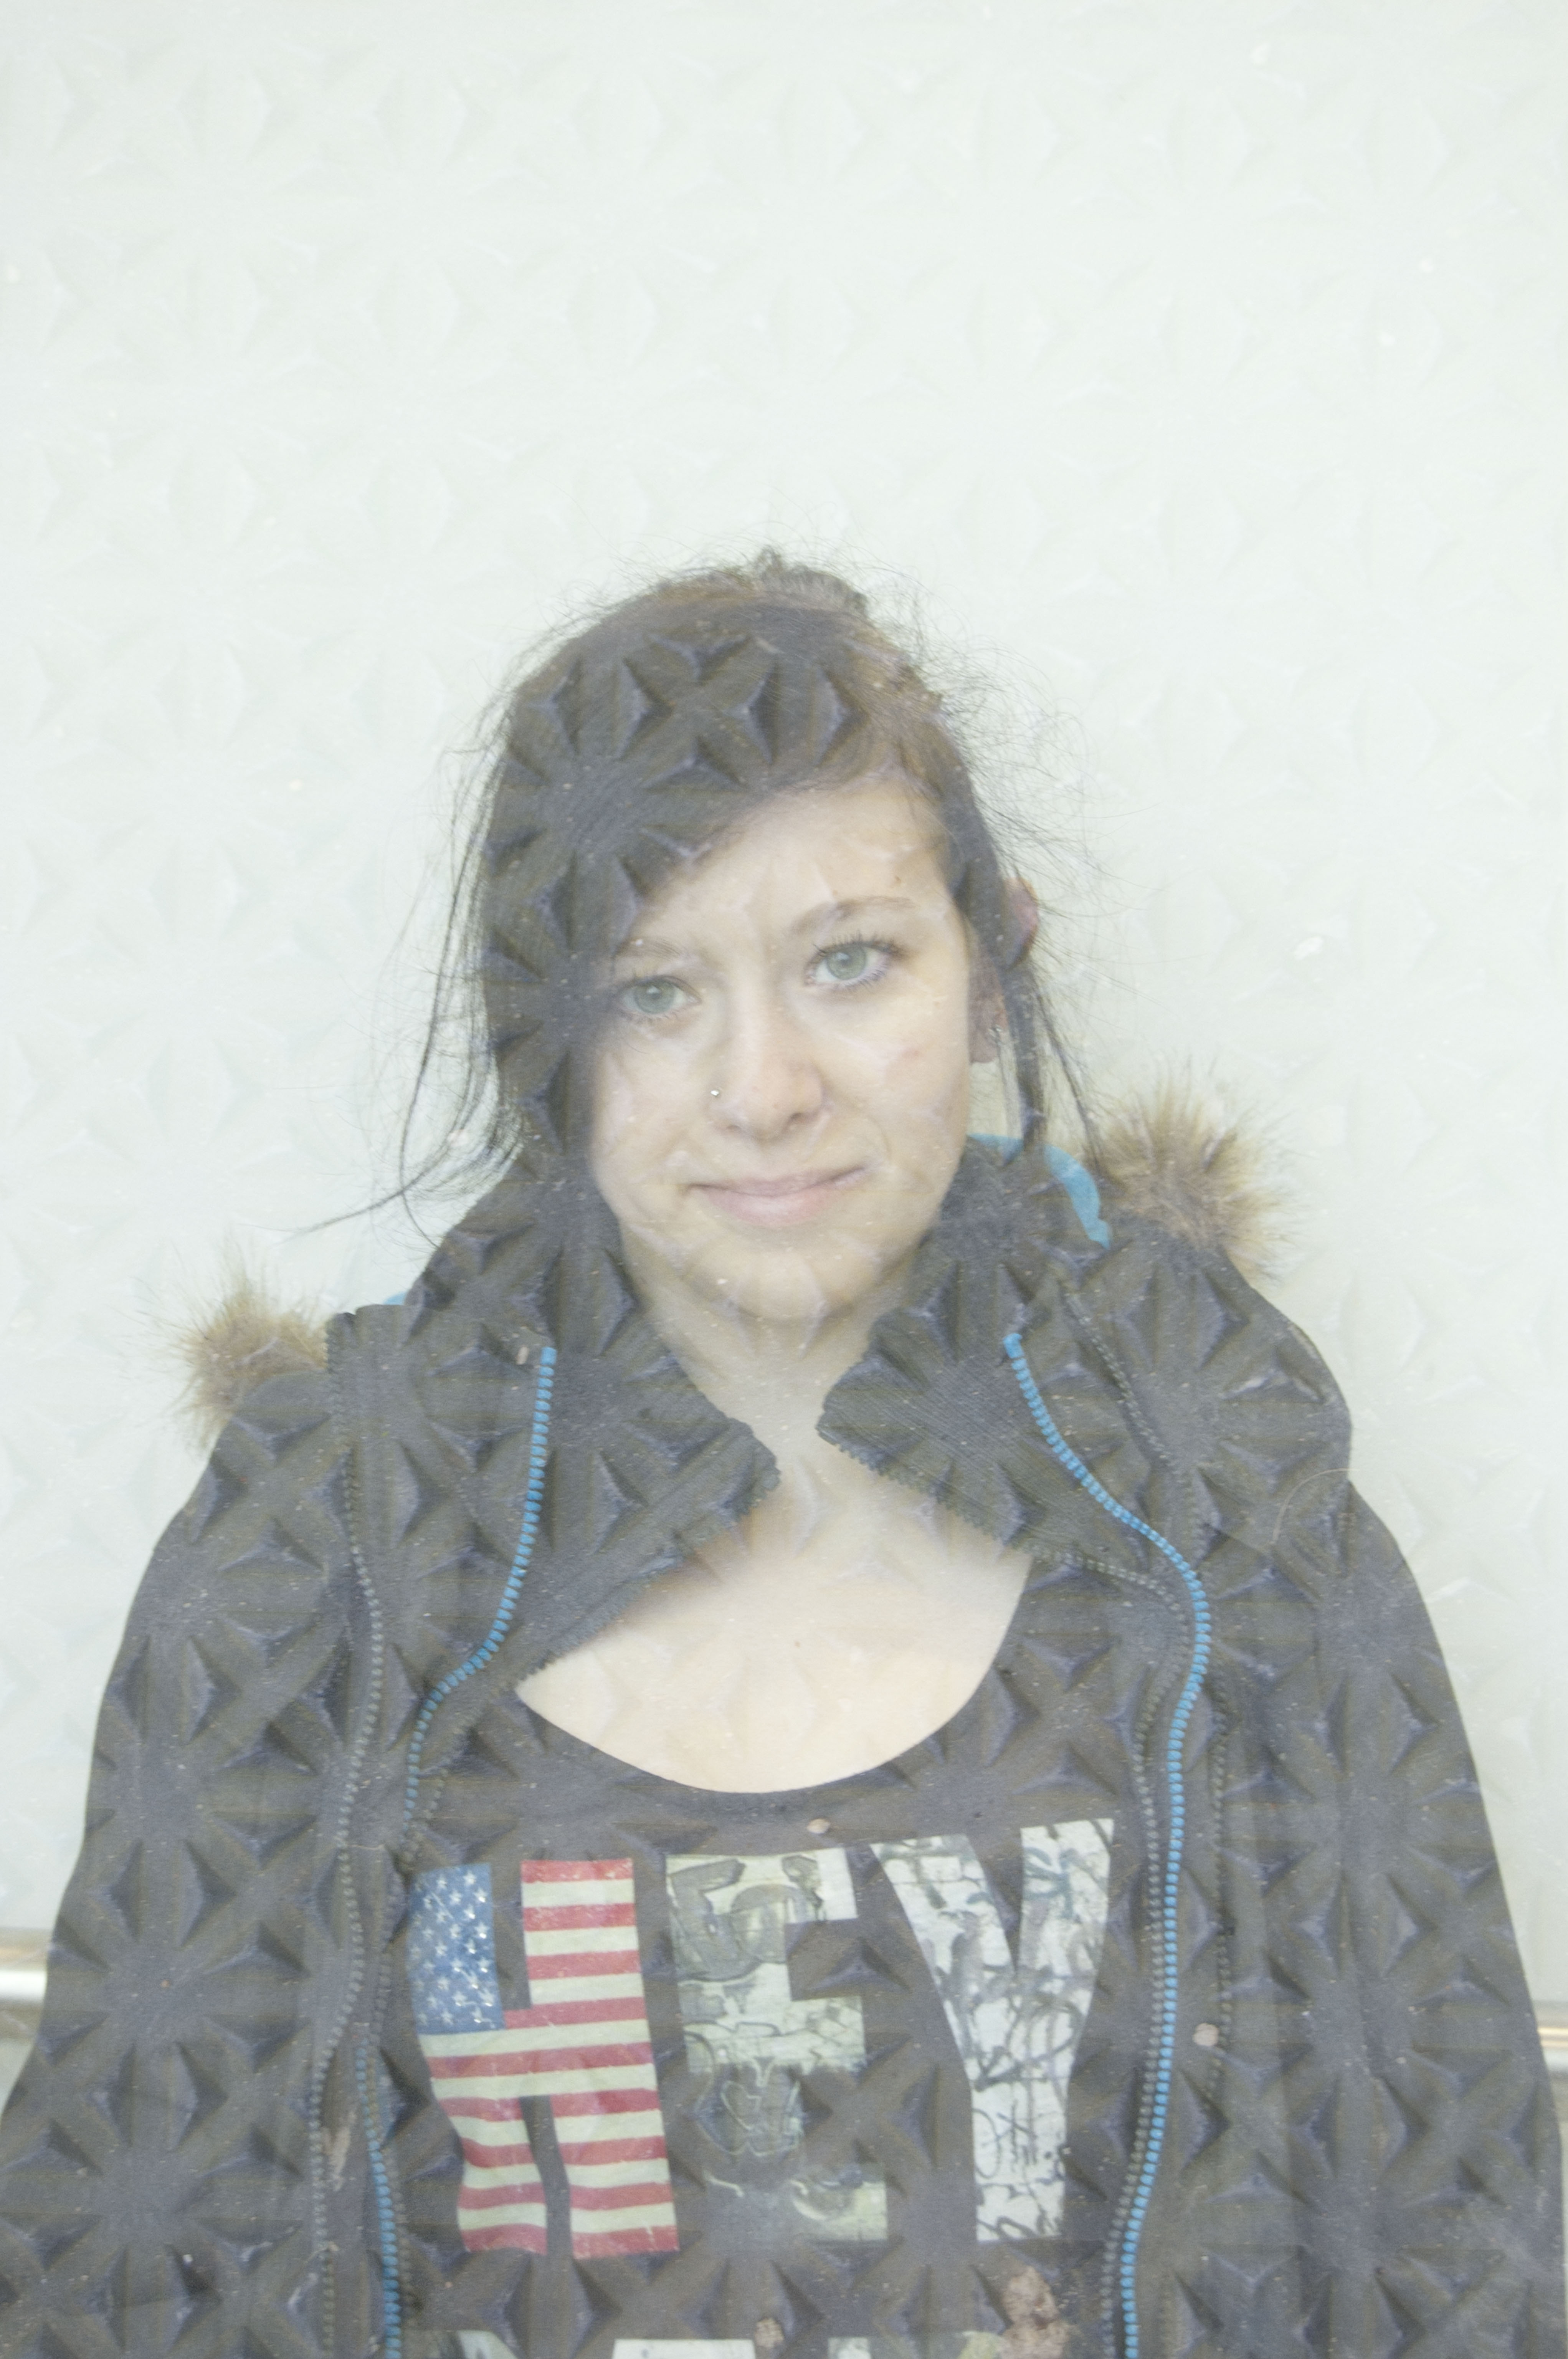
After this image, I found a picture of a brick wall and did the exact same thing, also using “Soft light” and then used the eraser tool (E) to go through the top layer and show my face, leaving my hair all “bricky”.

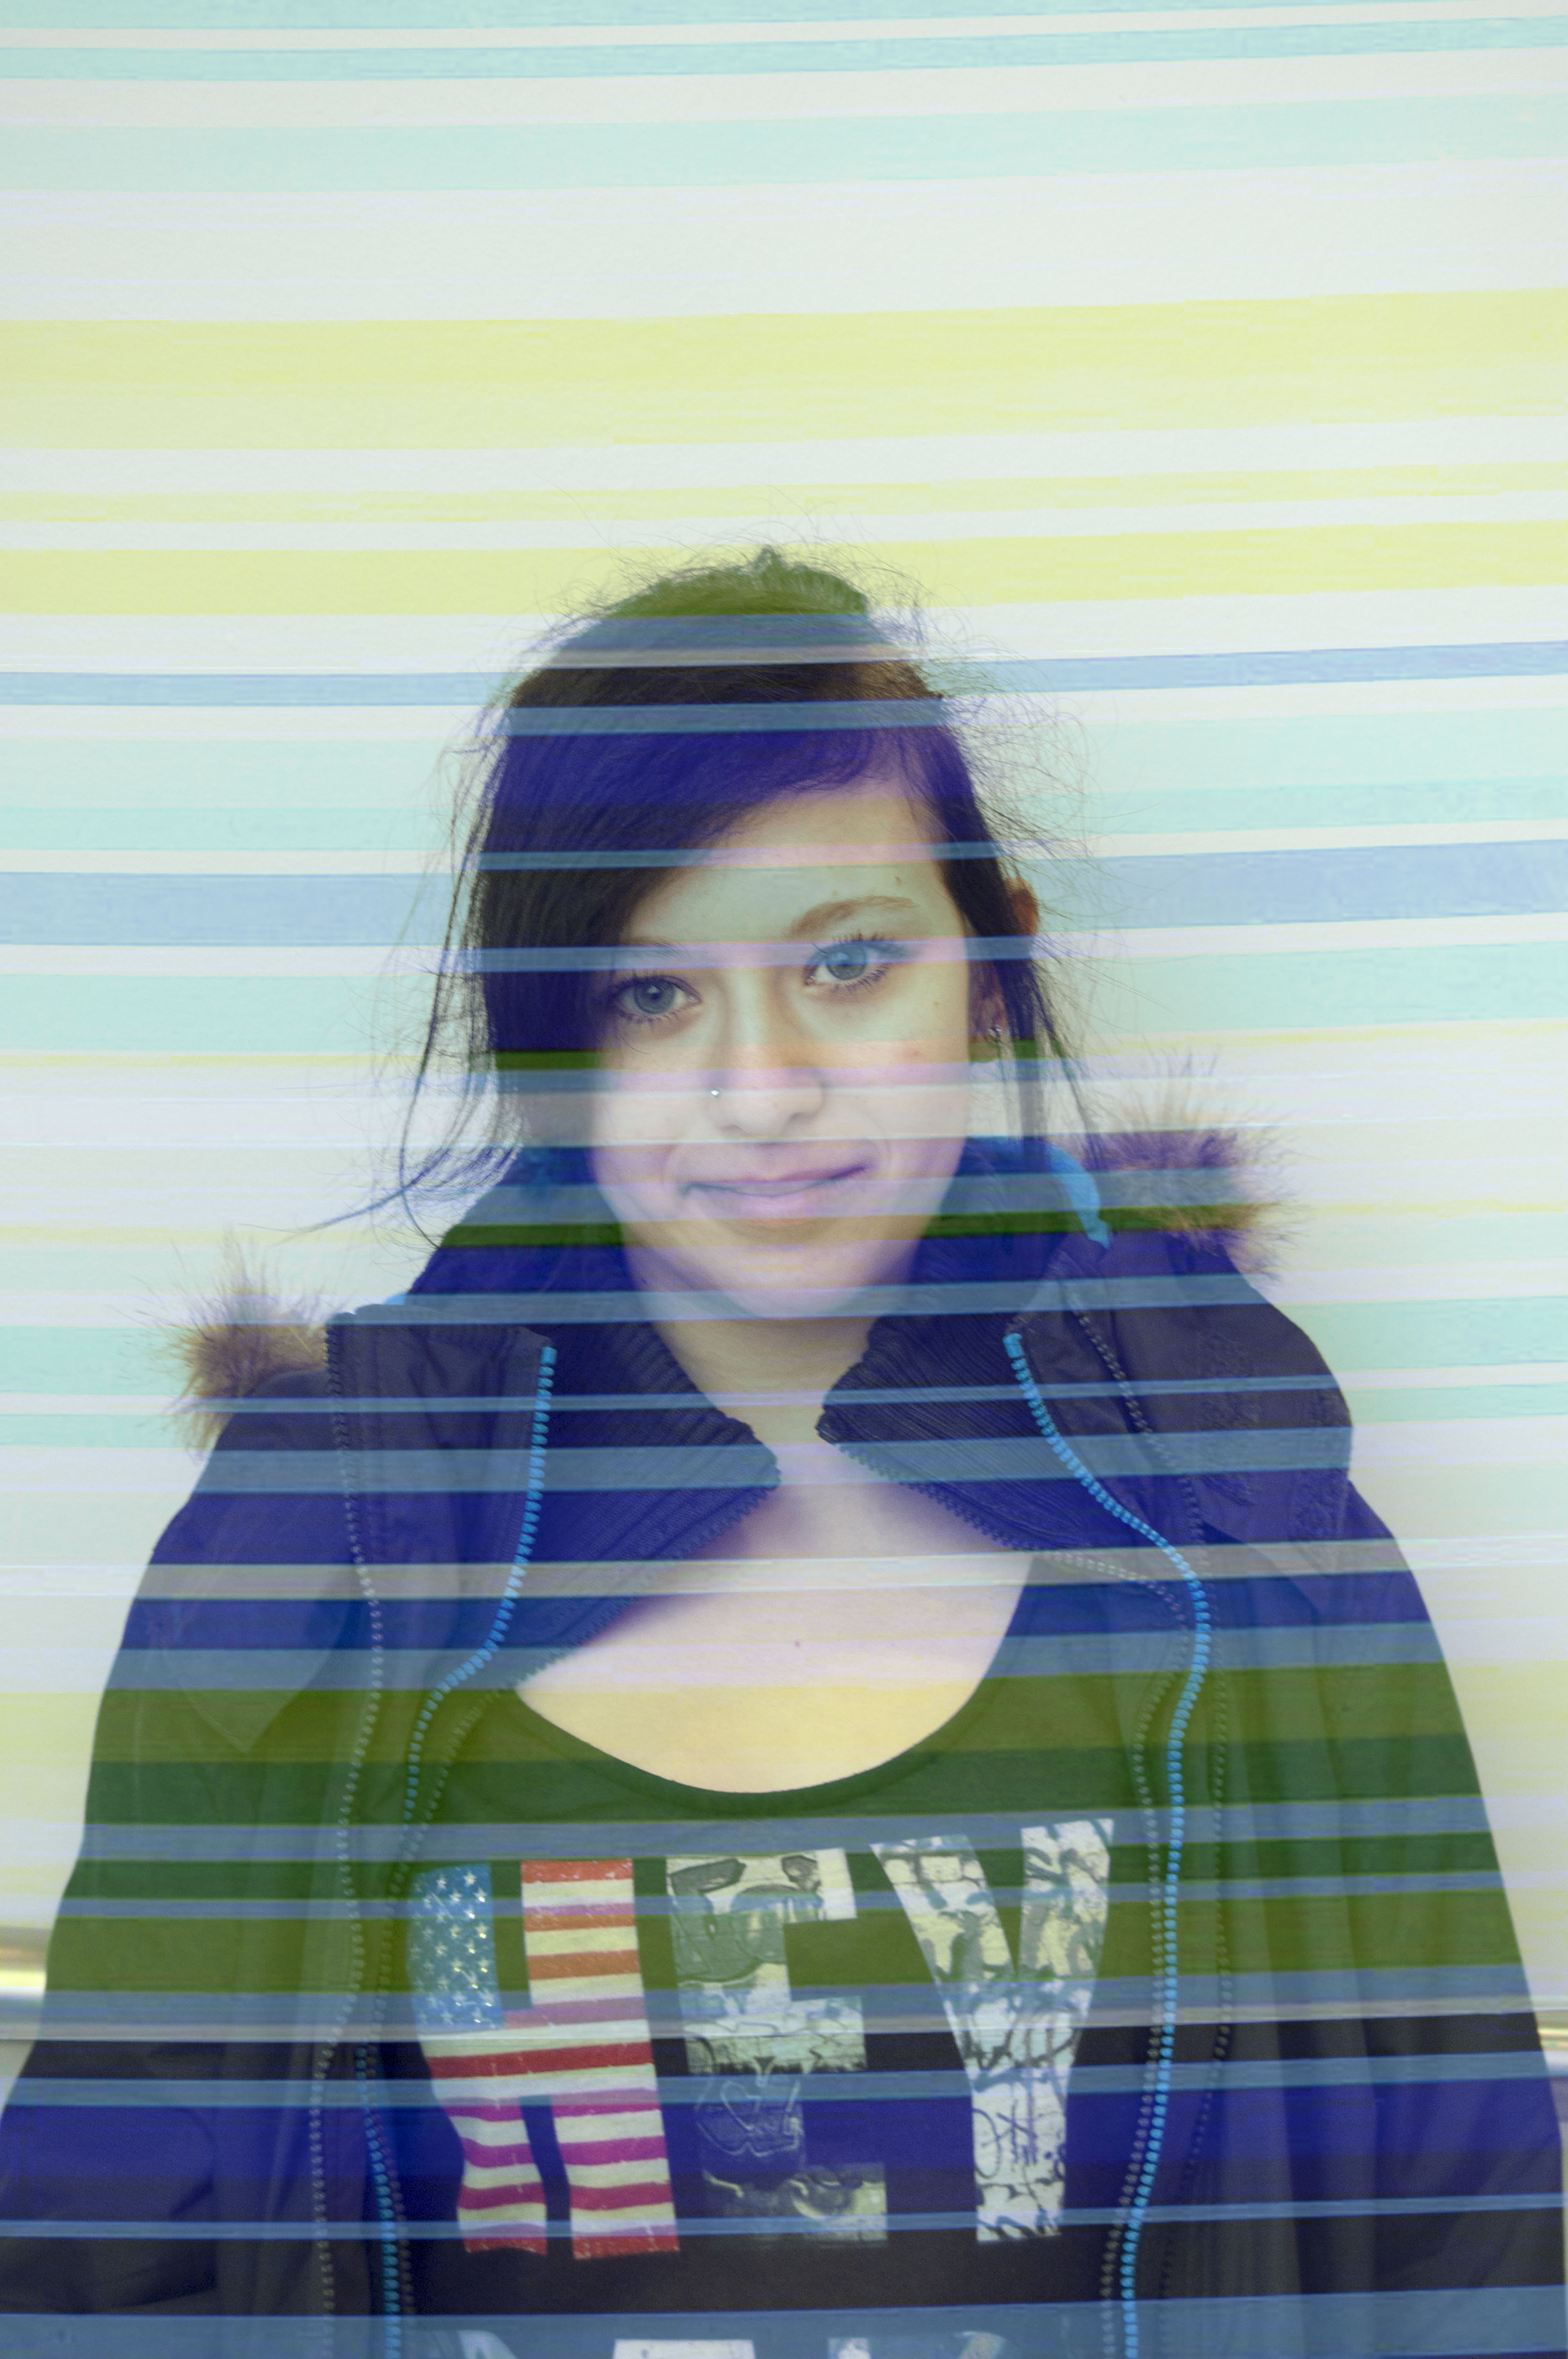
My last texture that was taken from the internet was a blue background with circles of light. I repeated the same thing once again but this time used the “Pin light” blending option and left it as it is.

OWN IMAGES:
We then went out and took our own texture pictures and repeated the whole process again. My first image was a picture taken of the texture of the jeans that I was wearing on that day. I chose “Lighten” and brought the opacity down a bit.

My other two images were of the wooden beams on the side of the college building, and one of the drain lid-things. The wooden one was using “Dissolve”, and the last one was “Overlay” on a really low opacity.

SCANNED OBJECTS:
My first thing that I scanned in was my bus pass holder which has penguins on it. Then I used one of my key rings which is a fluffy monkey because I liked the fluffy texture, and my last image was my stripey notebook. I used the same blending options for each one, (lighten) and just played about with the opacity.